How do I point a domain name to Department727 servers (Advanced Network)
The instructions below outline how to point a domain to a Department727 server. It should be noted that the screenshots below are from GoDaddy. Depending on the domain registrar the domain that you will be pointing is registered in, the interface may differ slightly. However, the instructions below should be applicable for most domain registrars.
IMPORTANT: Before pointing a domain, it is important to know if your client has existing email accounts @theirdomain. If they do, it is important to verify that the MX Records (email records) have already been set up in the Advanced DNS settings for their domain. If you are unsure, please contact us and we will let you know how to proceed.
Getting Started
- We will send you two A Records and one CNAME Record for the server. Here is an example of what it will look like (do not use these, they are just examples of the formatting):
- A Record: 12.345.678.90
- A Record: 12.345.678.90
- CNAME Record: wp.wpenginepowered.com
- Login to the domain name registrar (GoDaddy, NetSol, etc.) Once you’re logged in and click on the domain that you want to point.
- After you click on the domain you should see a link called Manage DNS. See example below. Note: it might be worded a little differently depending on the domain registrar).
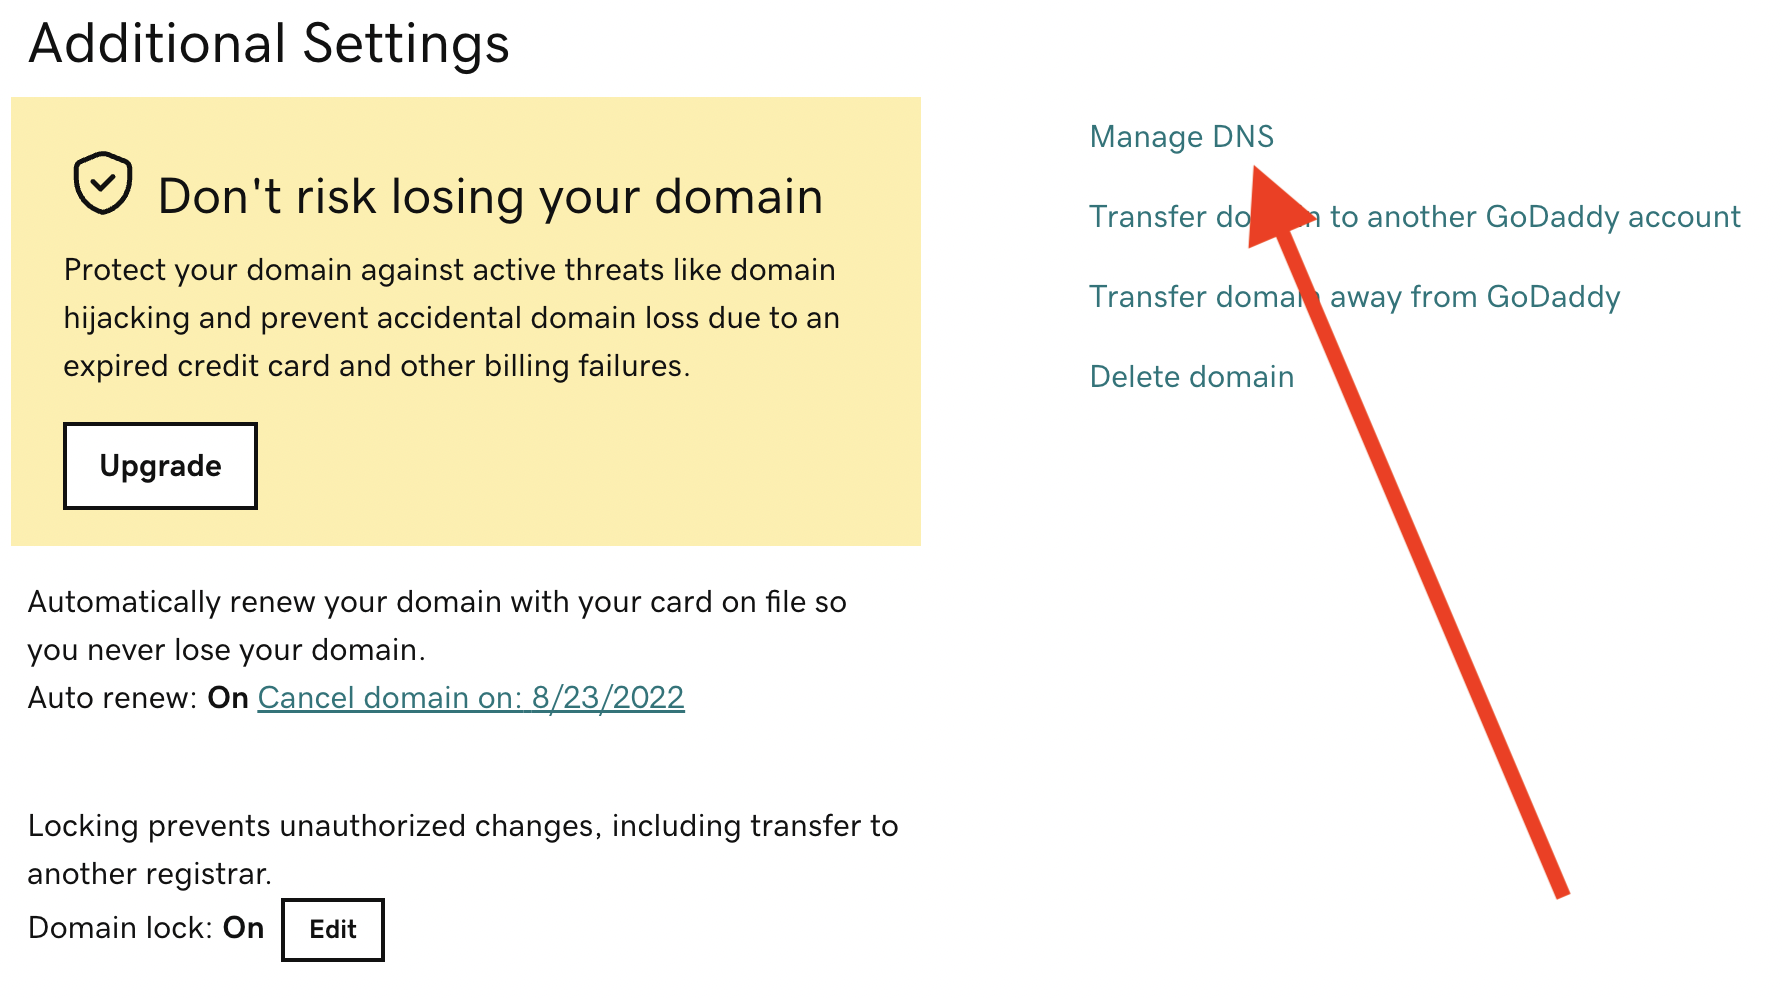
- Click on the Manage DNS link which will take you to the section where you can manage the Advanced DNS records. On this screen you will see a table that consists of rows of DNS records. Within each row there are columns that are typically labeled with headings such as Type, Name, Data and TTL.
- At this you need to find if the domain has existing A Records and CNAME Records. If the domain has these items, you’ll need to EDIT them. If the domain does not have these records, you’ll need to ADD them.
- IMPORTANT: The end result is that you should have two A Records (with the @ as the name) and one CNAME record (with www as the name).
- Follow the instructions below on EDITING and ADDING these records.
Edit An A Record
You want to find the row for the existing A Record. The row for the A Record can be found by looking at the column heading called Type and then look for cell that contains the letter “A” in it. That row will contain the settings for the A Record.
Note: Typically, the A Record is in the first row of the DNS Records (but on occasion can be further down in the table).
IMPORTANT: On occasion a domain does not have an existing A Record. In this scenario, you will need to create two new A Records. If it turns out that the DNS does not already contain any A Records, skip down to the section called Create An A Record.
- Assuming the DNS does have an existing A Record, the next step is to Edit the existing A Record. Click on the Edit button (as indicated in the screenshot below).

- Then delete what is in the Value field and replace it with the first A Record IP Address that we sent to you. To prevent any typos, it’s highly recommend to copy and paste the IP Address in the Value field. Once you have entered the first IP Address, click on the Save button to save your changes.
- With the first A Record updated successfully, now you need to add a new A Record for the second value.
Edit A CNAME Record
You want to find the row for the existing CNAME Record. The row for the CNAME Record can be found by looking at the column heading called Type and then look for cell that contains “CNAME” in it.
IMPORTANT: You’ll probably find that your domain has multiple CNAME Records… find the one that has “www” in the Type field.
- Assuming the DNS does have an existing CNAME Record, the next step is to Edit the existing CNAME Record. Click on the Edit button, sometimes it might be a little pencil (as indicated in the screenshot below).

- Then delete what is in the Value field and replace it with the CNAME Record IP Address that we sent to you. To prevent any typos, it’s highly recommend to copy and paste the IP Address in the Value field. Once you have entered the IP Address, click on the Save button to save your changes.
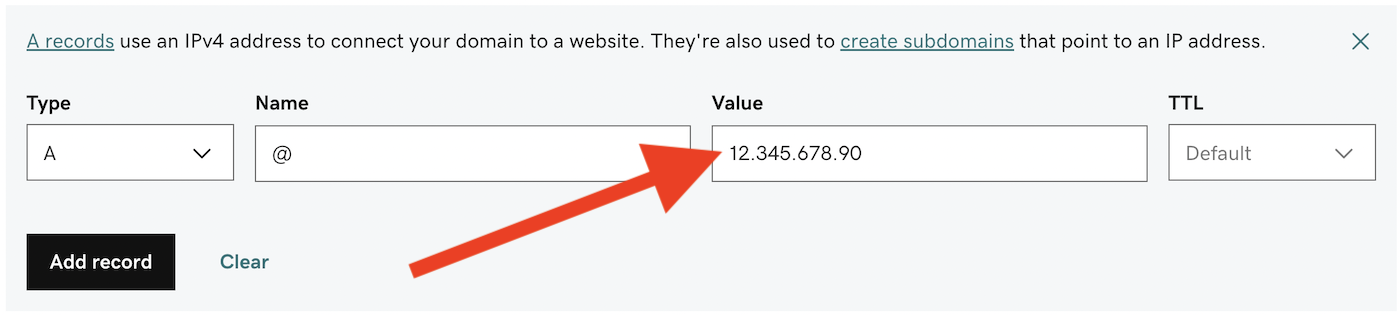
Create An A Record
- You should see a button or a text link that says “Add” or Add Record.” By clicking on that button a dialog box will appear, giving you options to create new DNS record.
- In the Type field select A (this is short for A Record).
- In the Name field, type @.
- In the Value field enter the IP Address that we sent you (it’s best to copy and paste this info into the Value field.)
- Leave TTL set to Default (if that’s not an option, select 1/2 Hour or something similar).
- Once you’ve completed creating the A Record, click the Add record (or Save button)
The end result should look something like this: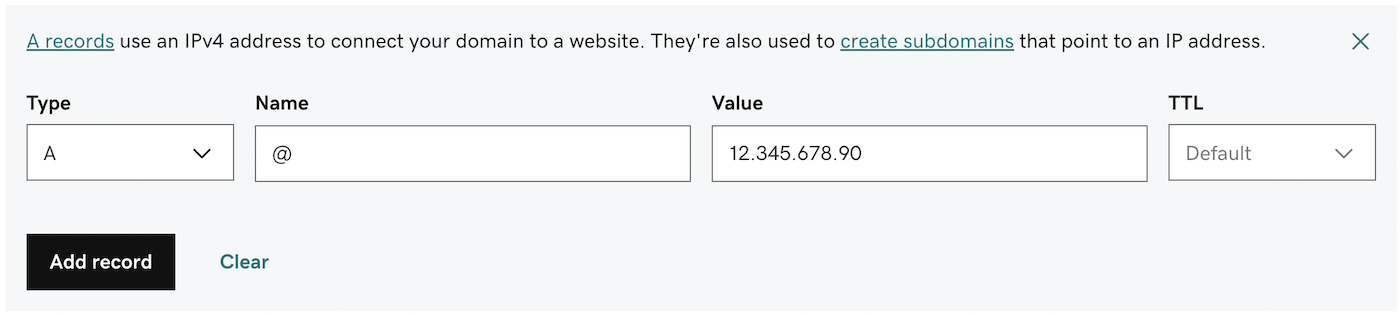
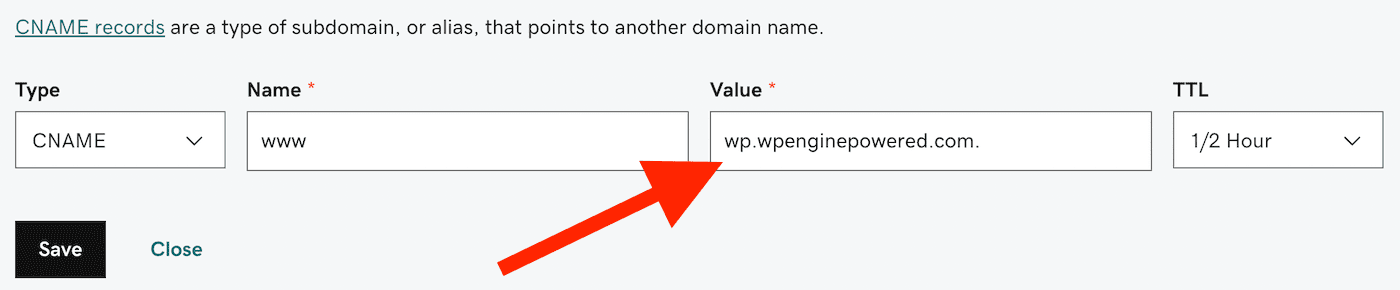
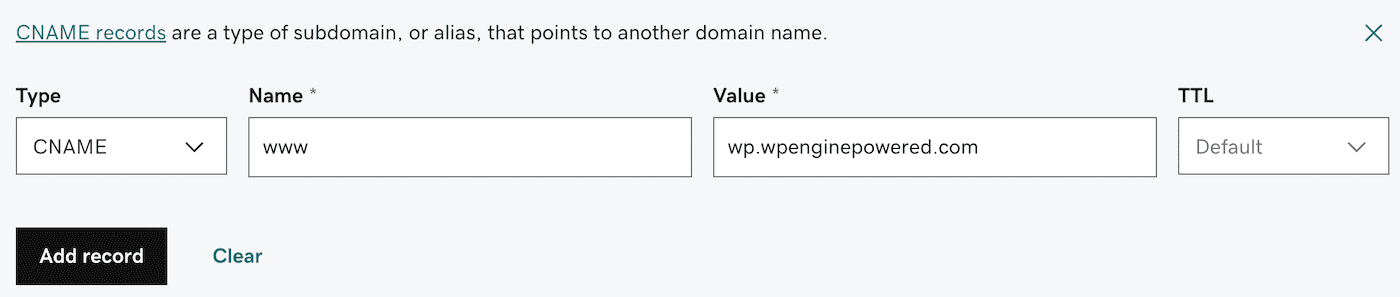
Create a CNAME Record
- You should see a button or a text link that says “Add” or Add Record.” By clicking on that button a dialog box will appear, giving you options to create new DNS record.
- In the Type field select CNAME
- In the Name field, type www
- In the Value field enter the CNAME IP Address that we sent you (it’s best to copy and paste this info into the Value field.)
- Leave TTL set to Default (if that’s not an option, select 1/2 Hour or something similar).
- Once you’ve completed creating the A Record, click the Add record (or Save button)
The end result should look something like this:
Once you have added or updated the two A Records and the one CNAME Record, the end result should look something like this:
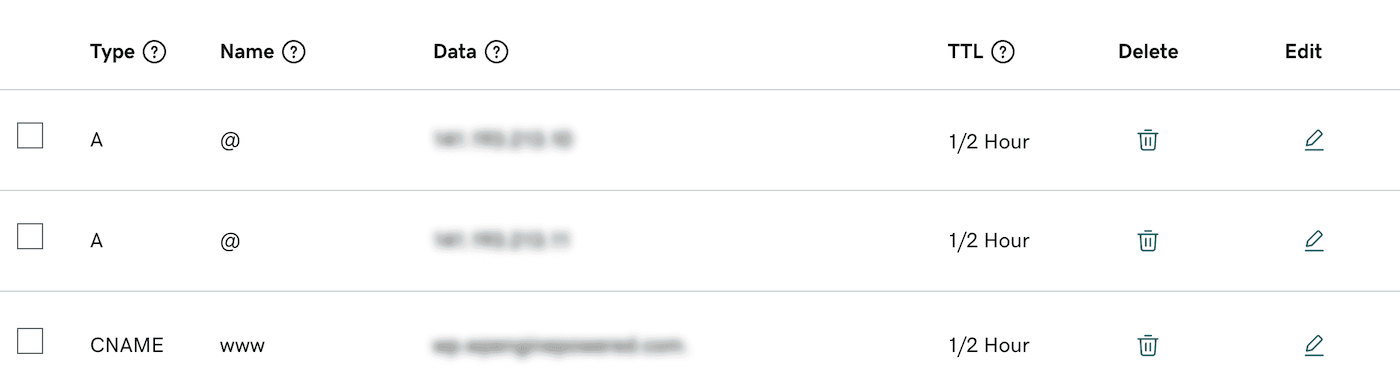
NOTE: On your screen these records will probably be next to each other, you might need to scroll down or change pages to see all three
You are done!
Once you have made these changes, the domain needs need time to propagate. The amount of time this takes can vary between domain registrars. Some domain name registrars recognize domain changes quickly, some take an hour or two and in some cases it can take up to 24 hours.
However, as soon as you have completed the above steps, send us an email letting us know and we’ll take over from here.